Overview:
This lesson introduces the idea of ‘control technology’ by looking at some familiar machines and appliances and how they are controlled. At this Beginner Level we are going to ignore the ‘processing’ stage (that comes later at Intermediate level) and just learn about INPUT and OUTPUT. At the Advanced Level we also introduce the idea of ‘loops’.
Aims:
- to understand the idea of ‘control’ in terms of machines, appliances etc
- to describe some every day examples of control technology and explain simply how they work.
- Using basic terminology like INPUT and OUTPUT
Activity:
Show the children some pictures or videos of everyday control technology. For example I use sets of laminated cards which have pictures of e.g
- a lift
- a parking barrier where you have to put a ticket in a slot
- a computer
- traffic lights
- a fridge
- a car
- an electric kettle that switches off automatically
- a remote control
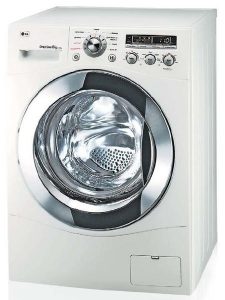
- a washing machine
- a radio or speaker that uses a knob to control volume
- a microwave
- a doorbell
- a vending machine
 Talk about what they are and ask the class what makes the machine / appliance do what you want it to do (a lever, a button, a keyboard, a knob etc).
You need another set of cards with pictures of the INPUT controls (i.e the actual knobs, buttons, dials, slots etc) for each of these and then children can try and match the pairs by playing Pelmanism games or by simply sorting them out. This is best done in groups so you will need several sets of cards. (At some point, these cards will be available as downloads).
Explain that the device needs to be told what to do and talk about the sorts of things that a washing machine or a toaster or a set of traffic lights or a lift can be told to do.
e.g spin faster, turn green, go to the 4th floor
 The important thing is to emphasise that:
- The machine needs to be told what to do – INPUT
- The machine has done what you told it to do – OUPUT
(If the children have already learned about electricity, you may well want to point out that in order to carry out the actions, the machine or appliance will also need a source of power to make it work, either from a socket in the wall or a battery or straight from the mains.)
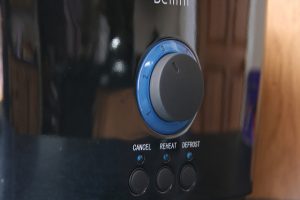
Demonstrate a kettle and a toaster working in the classroom
- Show how you can turn the dial to make a very pale piece of toast or a burnt piece of toast (take care not to trigger the school smoke alarms!)
- Watch how the light comes on when you put the kettle on the base and how it switches itself off when the water boils (or however your kettle works!)
Then using the same cards with the pictures of machines and controls, ask the children to match them with the sorts of instructions you might want to give the machine. If the children can read, then you can give them a 3rd set of cards
 with possible OUTPUTS such as:
- a picture of a little green man walking
- move up to the third floor
- wet, clean clothes
- the bread goes brown then pops up.
- the barrier goes up
- the inside gets very cold and a light comes on when the door is opened
- a character jumps in a computer game
- boiling water
- a different television channel
- louder music
- a Mars bar drops in the tray
- etc
If you prefer, you could read out the instructions and let each group hold up the picture of the appliance they think it relates to.
Throughout the lesson introduce and reinforce the words ‘input’ and ‘output’. You can encourage children to use these words and you can also make a wall display from the sets of cards and use them as headings.
If you have the time and the resources it is worth introducing a practical experiment or this could be done as a follow up science lesson. For example:
A simple circuit with a light bulb and a switch (where the switch is the control and the light is the output)
A useful follow-on lesson from this one is ‘Sensors’

One Comment on “FP/KS1 Understanding input and output”